You can pay a professional (such as an authorized Airstream dealer) to winterize your camper trailer, but winterization is not as hard as it might seem.
Save yourself the cost of winterization RV services (upwards of $200) with our comprehensive guide on how to winterize your Airstream travel trailer. Follow these directions to learn how to drain the plumbing system, flush the fresh water tank, and finish with RV antifreeze.
 You’ll also want to drain the water heater.
[gallery columns="2" link="file" size="large" ids="53619,53617,53616,53620"]
The next step is to flush the tanks with fresh water so they are as clean as possible.
Locating all these plugs can often be the most difficult part of this process – consult your owner’s manual to locate drain plugs. You should also remove any water filters that are installed. Once you’ve flushed your tanks out, remember to reinstall any drain plugs.
You’ll also want to drain the water heater.
[gallery columns="2" link="file" size="large" ids="53619,53617,53616,53620"]
The next step is to flush the tanks with fresh water so they are as clean as possible.
Locating all these plugs can often be the most difficult part of this process – consult your owner’s manual to locate drain plugs. You should also remove any water filters that are installed. Once you’ve flushed your tanks out, remember to reinstall any drain plugs.
 It’s helpful to have an assistant to go inside and begin opening each faucet, one at a time. The compressed air will blow any remaining water out through the faucet. If the faucets have both hot and cold water functions, rotate the handles all the way from cold to hot to allow all the lines to clear.
Then, one at a time:
It’s helpful to have an assistant to go inside and begin opening each faucet, one at a time. The compressed air will blow any remaining water out through the faucet. If the faucets have both hot and cold water functions, rotate the handles all the way from cold to hot to allow all the lines to clear.
Then, one at a time:
 Finally, blow compressed air into the black tank flush to force all remaining water out of the tank. Remove the blow out plug, and then add one cup of RV antifreeze to all sink drains and the toilet.
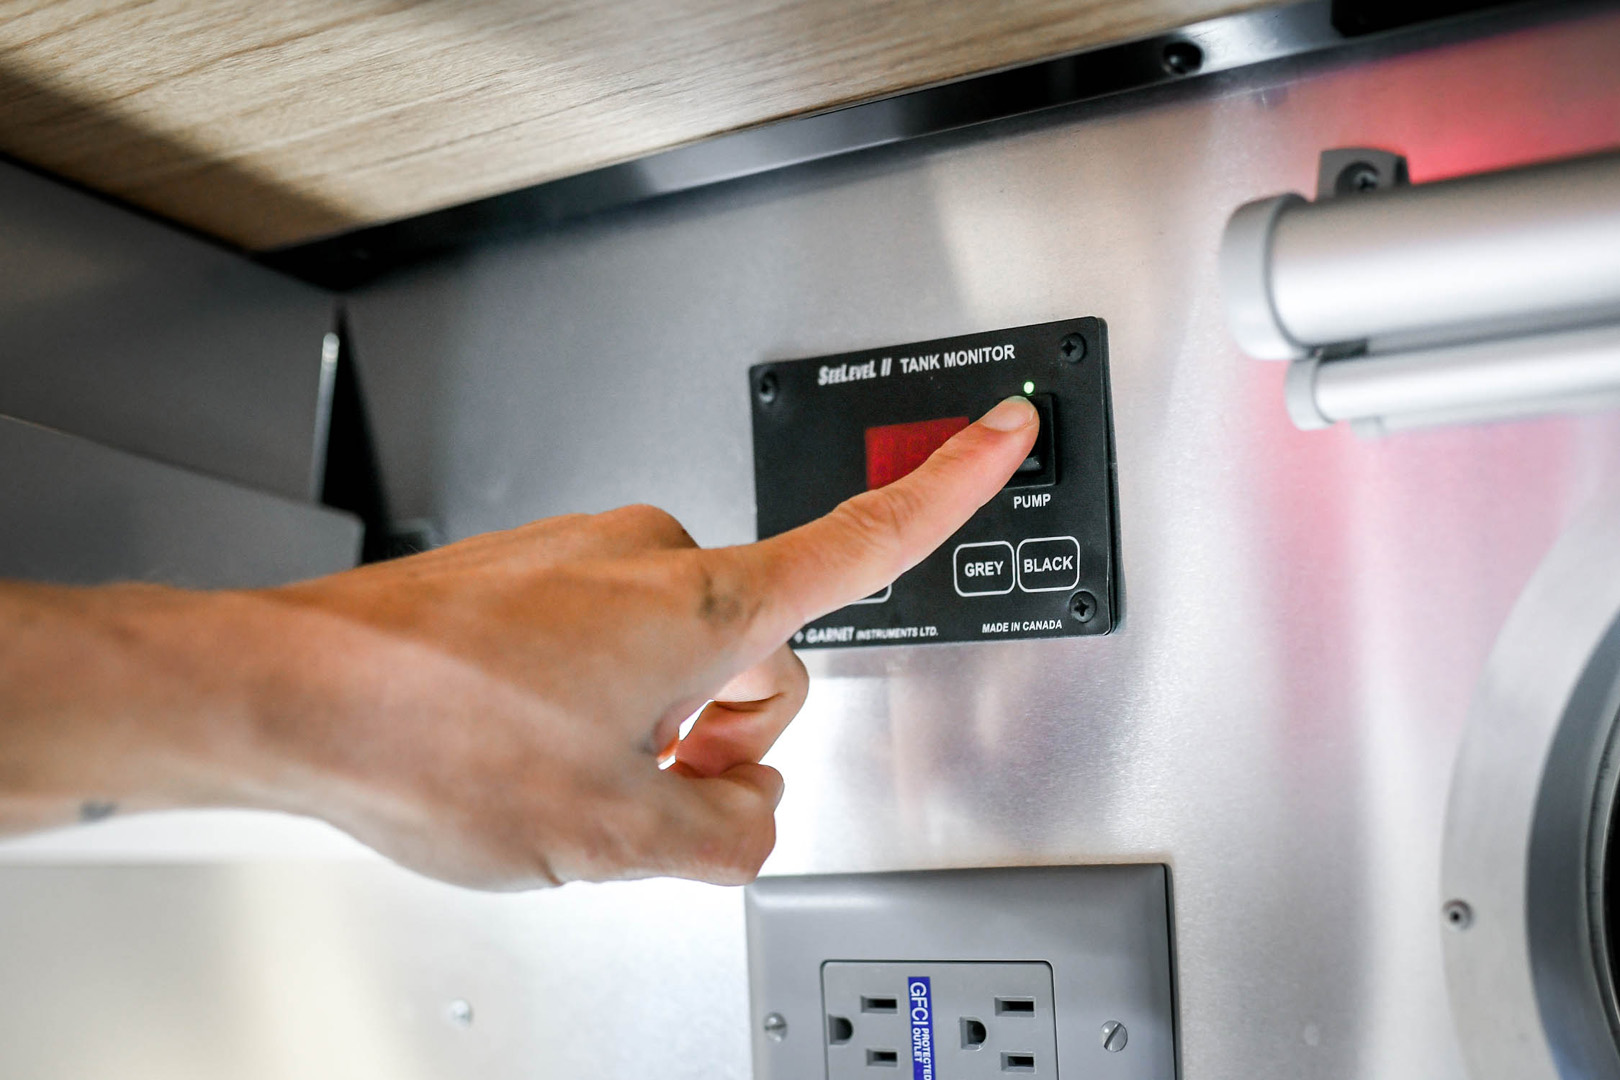
 Make sure the water pump is off and all faucets are closed. Close the water heater’s bypass valve (if it has one). This is an important step because it saves you the six gallons of RV antifreeze needed to fill the hot water heater. Attach the Pump Converter Kit to the inlet side of the water pump. Then turn on the water pump to start pumping the RV antifreeze through the water system.
[gallery columns="2" size="large" link="file" ids="53626,53625,53628,53627"]
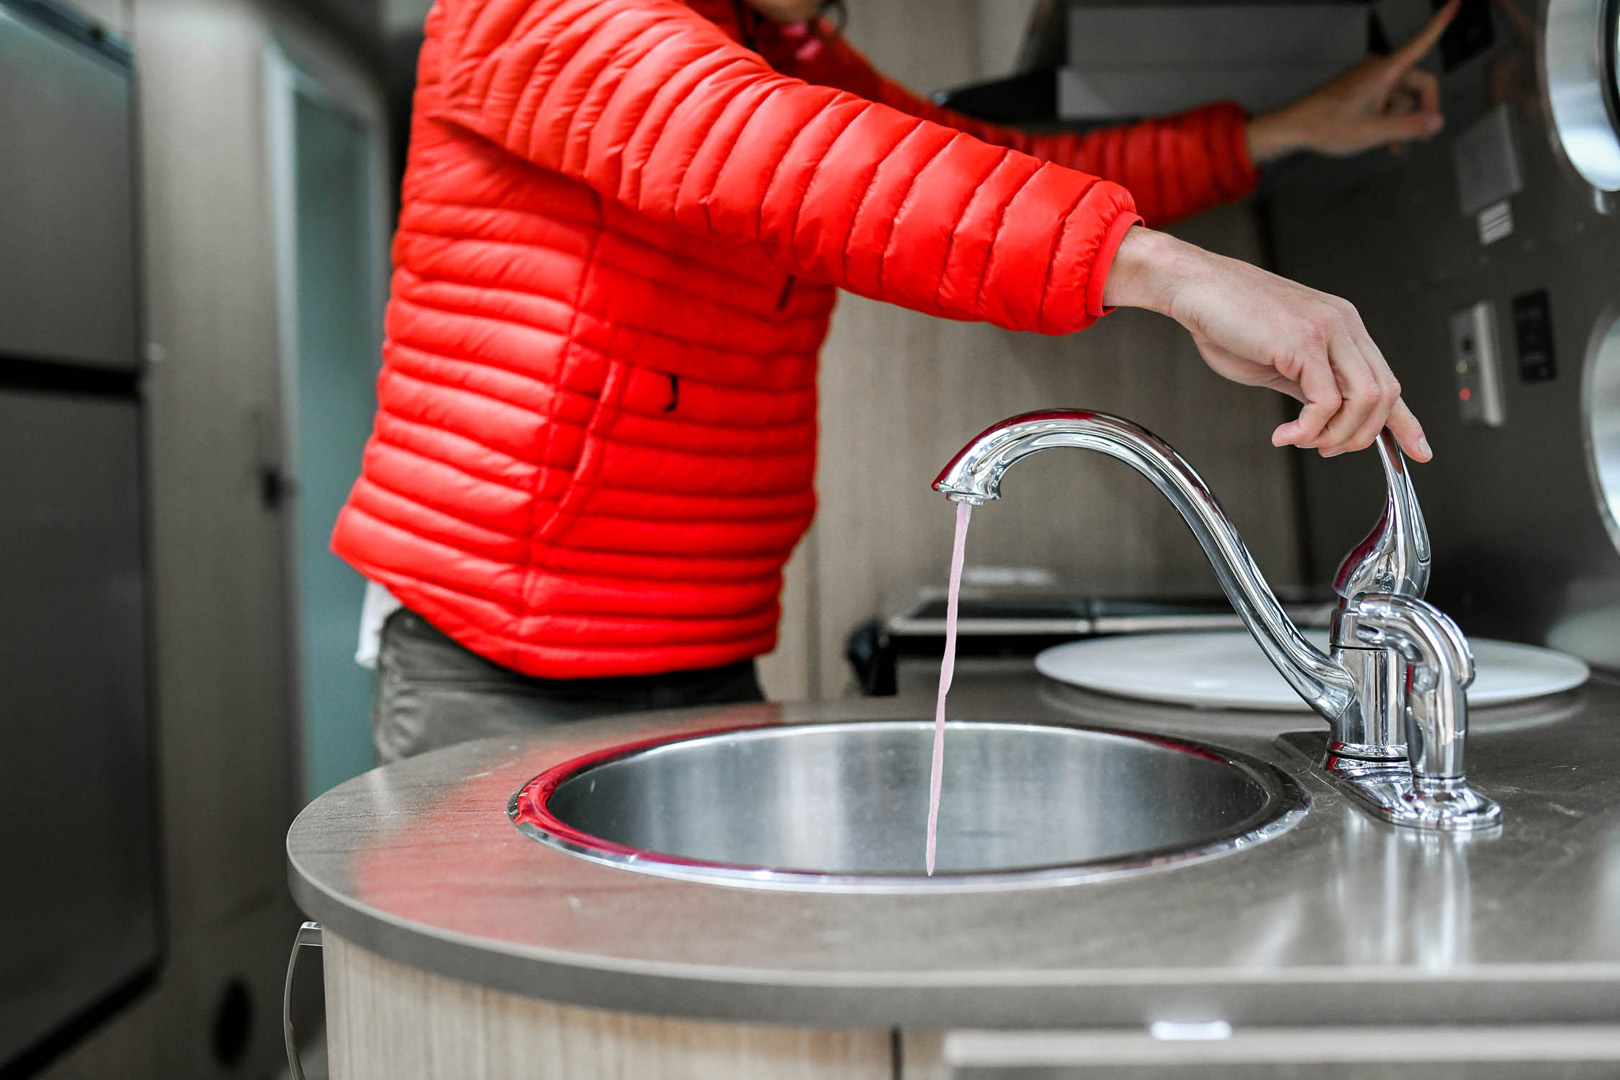
Inside the Airstream, open each hot and cold faucet line one at a time until you see the noticeably red color of the antifreeze flowing through. Open the toilet valve and the shower until antifreeze flows through. Once the lines are flowing with antifreeze, shut off the valves and add one cup of RV antifreeze to all sink drains and the toilet.
Make sure the water pump is off and all faucets are closed. Close the water heater’s bypass valve (if it has one). This is an important step because it saves you the six gallons of RV antifreeze needed to fill the hot water heater. Attach the Pump Converter Kit to the inlet side of the water pump. Then turn on the water pump to start pumping the RV antifreeze through the water system.
[gallery columns="2" size="large" link="file" ids="53626,53625,53628,53627"]
Inside the Airstream, open each hot and cold faucet line one at a time until you see the noticeably red color of the antifreeze flowing through. Open the toilet valve and the shower until antifreeze flows through. Once the lines are flowing with antifreeze, shut off the valves and add one cup of RV antifreeze to all sink drains and the toilet.
 Finally, shut off the water pump to stop the flow of antifreeze through the system.
 With the hardest part of RV winterization behind you, the next step is to button up your travel trailer for storage. Here’s a checklist that covers many of the necessary steps you should take during your winterization process. Trust us: You’ll thank yourself for taking time to do this when the warm temps come calling:
Why should I winterize my travel trailer?
Winterizing your travel trailer makes sure that come next spring, your trailer is ready for adventures. By going through these steps, you help minimize the need for expensive repairs. If you won't be using your camper trailer in all seasons, it's important to make sure all water is out of your RV. If water is left in the pipes or lines, you risk having them freeze, expand, and become damaged. You also want to make sure your travel trailer is ready to set in storage. Checking all the seals, seams, and plugs you prevent any unwelcomed guests from taking up residence in your trailer. You also need to make sure the battery is unhooked and electrical systems are shut off.When should I winterize my Airstream?
There’s no easy answer to the question How cold can it get before I have to winterize my camper? A few days of freezing temperatures overnight probably won’t do any harm, but you’ll have to judge for yourself when to pull the plug on camping season. The USDA Plant Hardiness Zones will give you an idea of when to expect freezing temperatures. The real question is how much winterization do you want to do at one time? Many Airstreamers “winterize for use.” They blow out all the water and cycling RV antifreeze through the system – and continue to use their Airstream throughout the colder months. Others, though, want to store their Airstream and not use it until spring. In that case, the full winterization regimen should be followed in order to prep for storage.What is the best way to winterize an Airstream?
There are two ways to winterize:- Using an air compressor to blow out the water or
- pumping RV antifreeze through the system via the water pump.
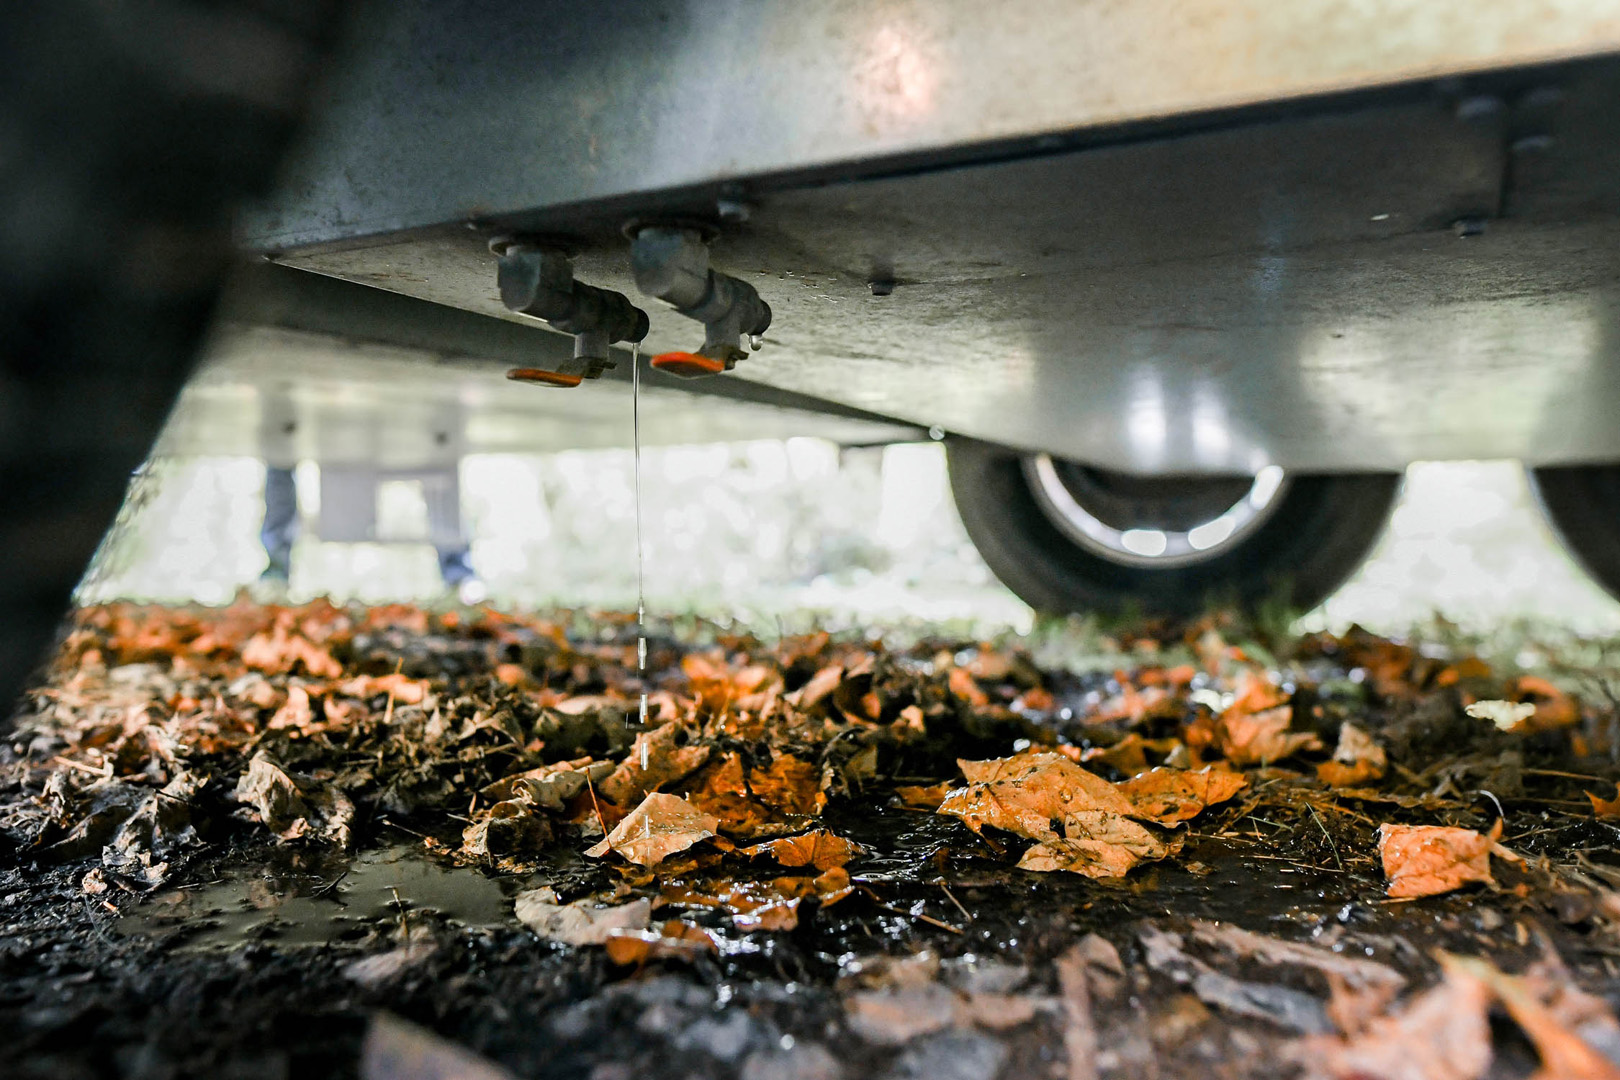
Step 1: Drain and Flush
Before using an air compressor or RV antifreeze, you must first open the drain plugs and empty the grey, black, and fresh tanks.
You’ll also want to drain the water heater.
[gallery columns="2" link="file" size="large" ids="53619,53617,53616,53620"]
The next step is to flush the tanks with fresh water so they are as clean as possible.
Locating all these plugs can often be the most difficult part of this process – consult your owner’s manual to locate drain plugs. You should also remove any water filters that are installed. Once you’ve flushed your tanks out, remember to reinstall any drain plugs.
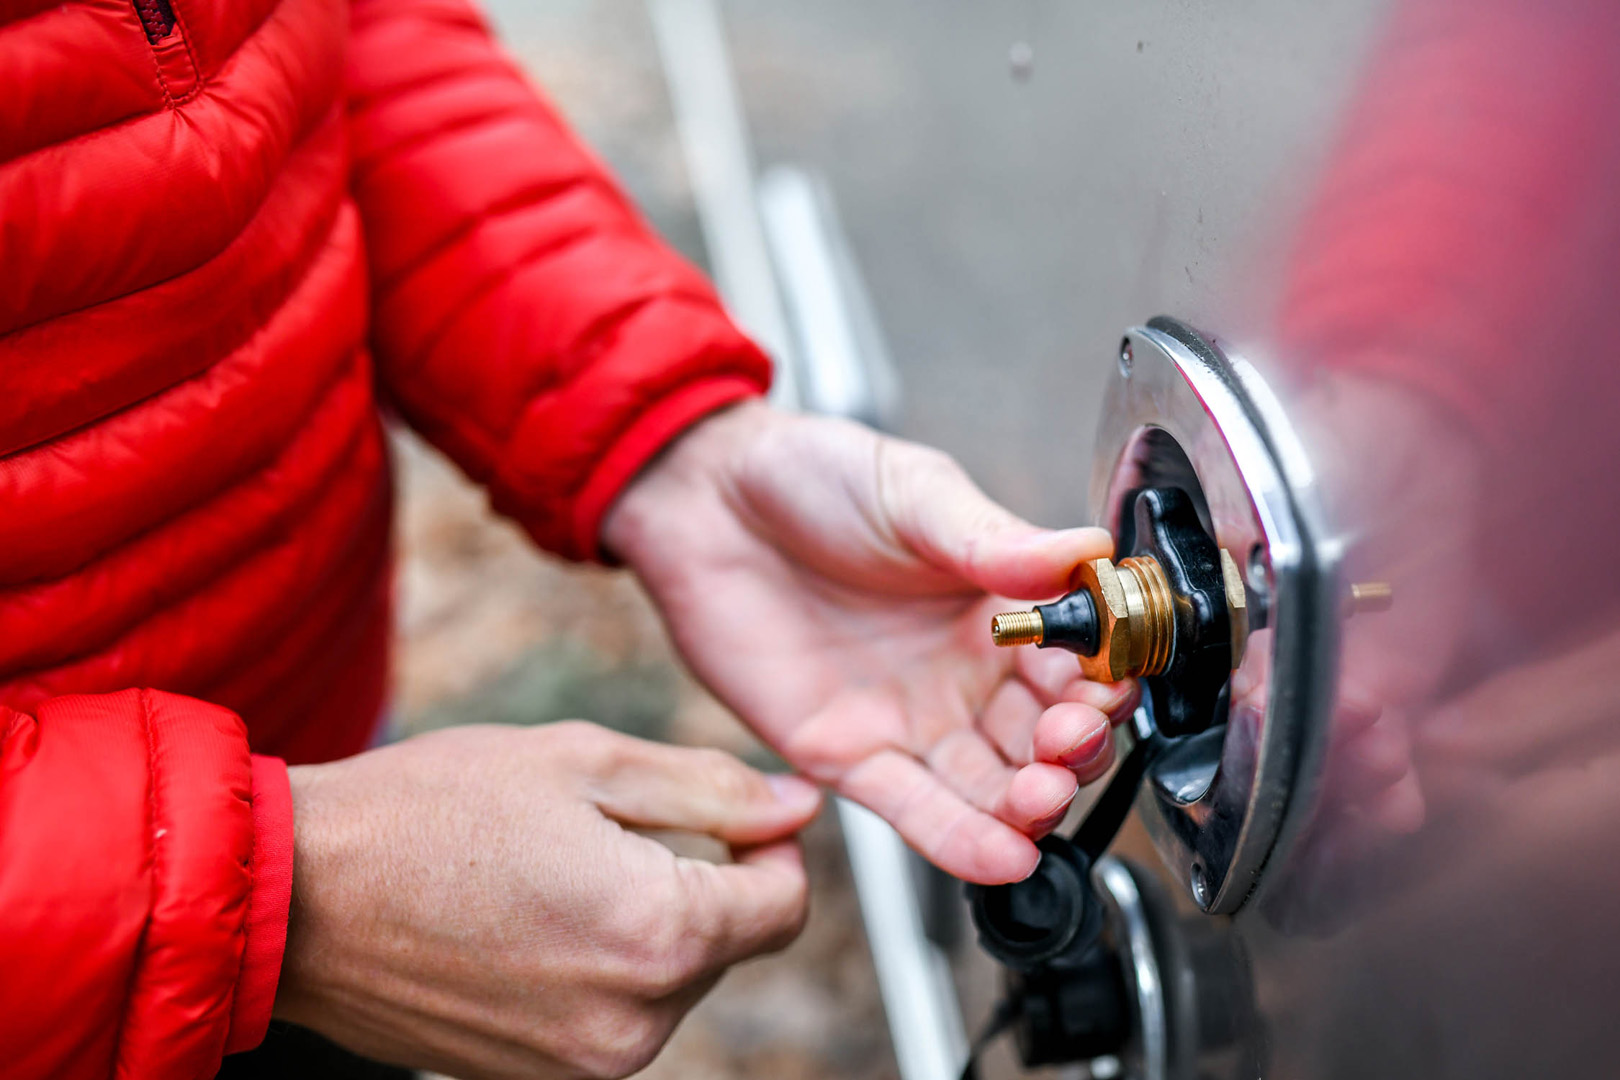
Step 2-A: Using an Air Compressor to Winterize
If you have access to an air compressor, all you need is a compressed air adaptor (aka a blow out plug). Screw the blow out plug into the city water connection on the exterior wall of your Airstream, connect the air compressor nozzle, and begin applying compressed air. Keep in mind that you must keep air pressure under 60 psi or risk damaging internal systems.
It’s helpful to have an assistant to go inside and begin opening each faucet, one at a time. The compressed air will blow any remaining water out through the faucet. If the faucets have both hot and cold water functions, rotate the handles all the way from cold to hot to allow all the lines to clear.
Then, one at a time:
- Flush the toilet (and depress the toilet hand sprayer if you have one).
- Turn on the shower (and the external shower if you have one).
- Depending on your Airstream model, you may also have other appliances that utilize water, such as an ice maker, washing machine, or tub.
Finally, blow compressed air into the black tank flush to force all remaining water out of the tank. Remove the blow out plug, and then add one cup of RV antifreeze to all sink drains and the toilet.
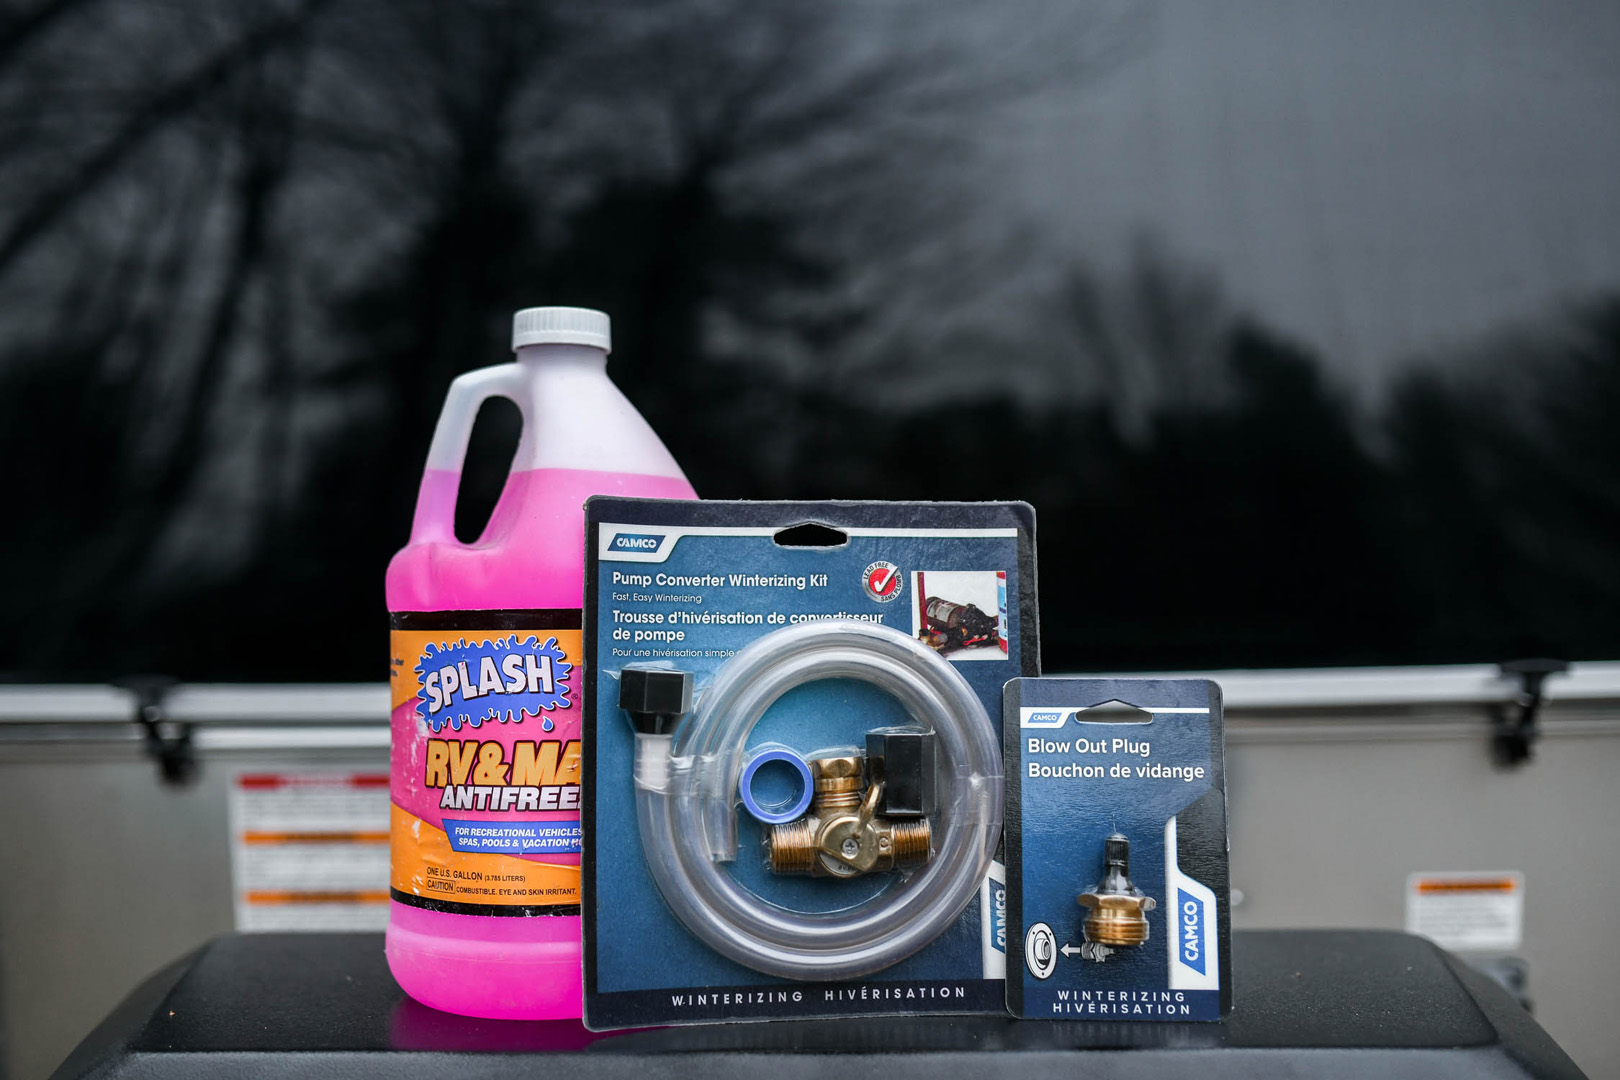
Step 2B: Using RV Antifreeze to Winterize
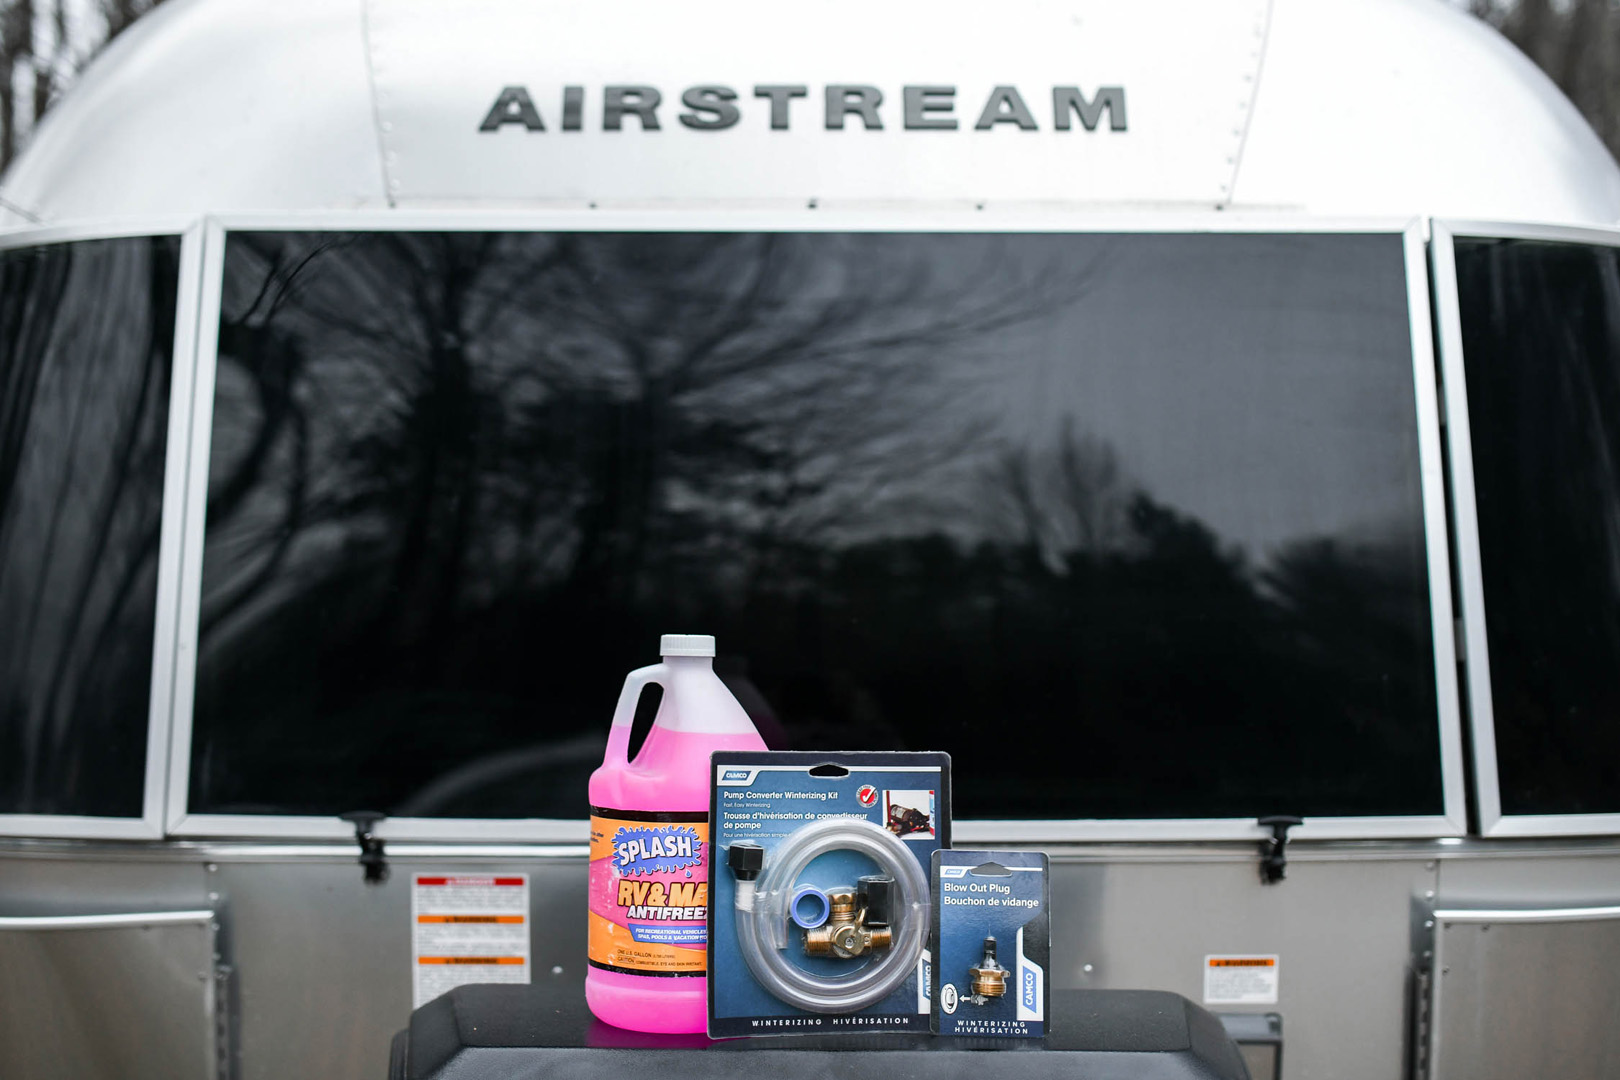
You can also winterize your travel trailer with non-toxic RV antifreeze. You’ll need a Pump Converter Kit (also known as a pass kit), as well as approximately two gallons of RV antifreeze. Special note: DO NOT USE REGULAR AUTOMOTIVE ANTIFREEZE. IT IS HIGHLY TOXIC. USE ONLY NON-TOXIC RV ANTIFREEZE.
Make sure the water pump is off and all faucets are closed. Close the water heater’s bypass valve (if it has one). This is an important step because it saves you the six gallons of RV antifreeze needed to fill the hot water heater. Attach the Pump Converter Kit to the inlet side of the water pump. Then turn on the water pump to start pumping the RV antifreeze through the water system.
[gallery columns="2" size="large" link="file" ids="53626,53625,53628,53627"]
Inside the Airstream, open each hot and cold faucet line one at a time until you see the noticeably red color of the antifreeze flowing through. Open the toilet valve and the shower until antifreeze flows through. Once the lines are flowing with antifreeze, shut off the valves and add one cup of RV antifreeze to all sink drains and the toilet.
Finally, shut off the water pump to stop the flow of antifreeze through the system.
Step 3: Beyond the Water System
With the hardest part of RV winterization behind you, the next step is to button up your travel trailer for storage. Here’s a checklist that covers many of the necessary steps you should take during your winterization process. Trust us: You’ll thank yourself for taking time to do this when the warm temps come calling:
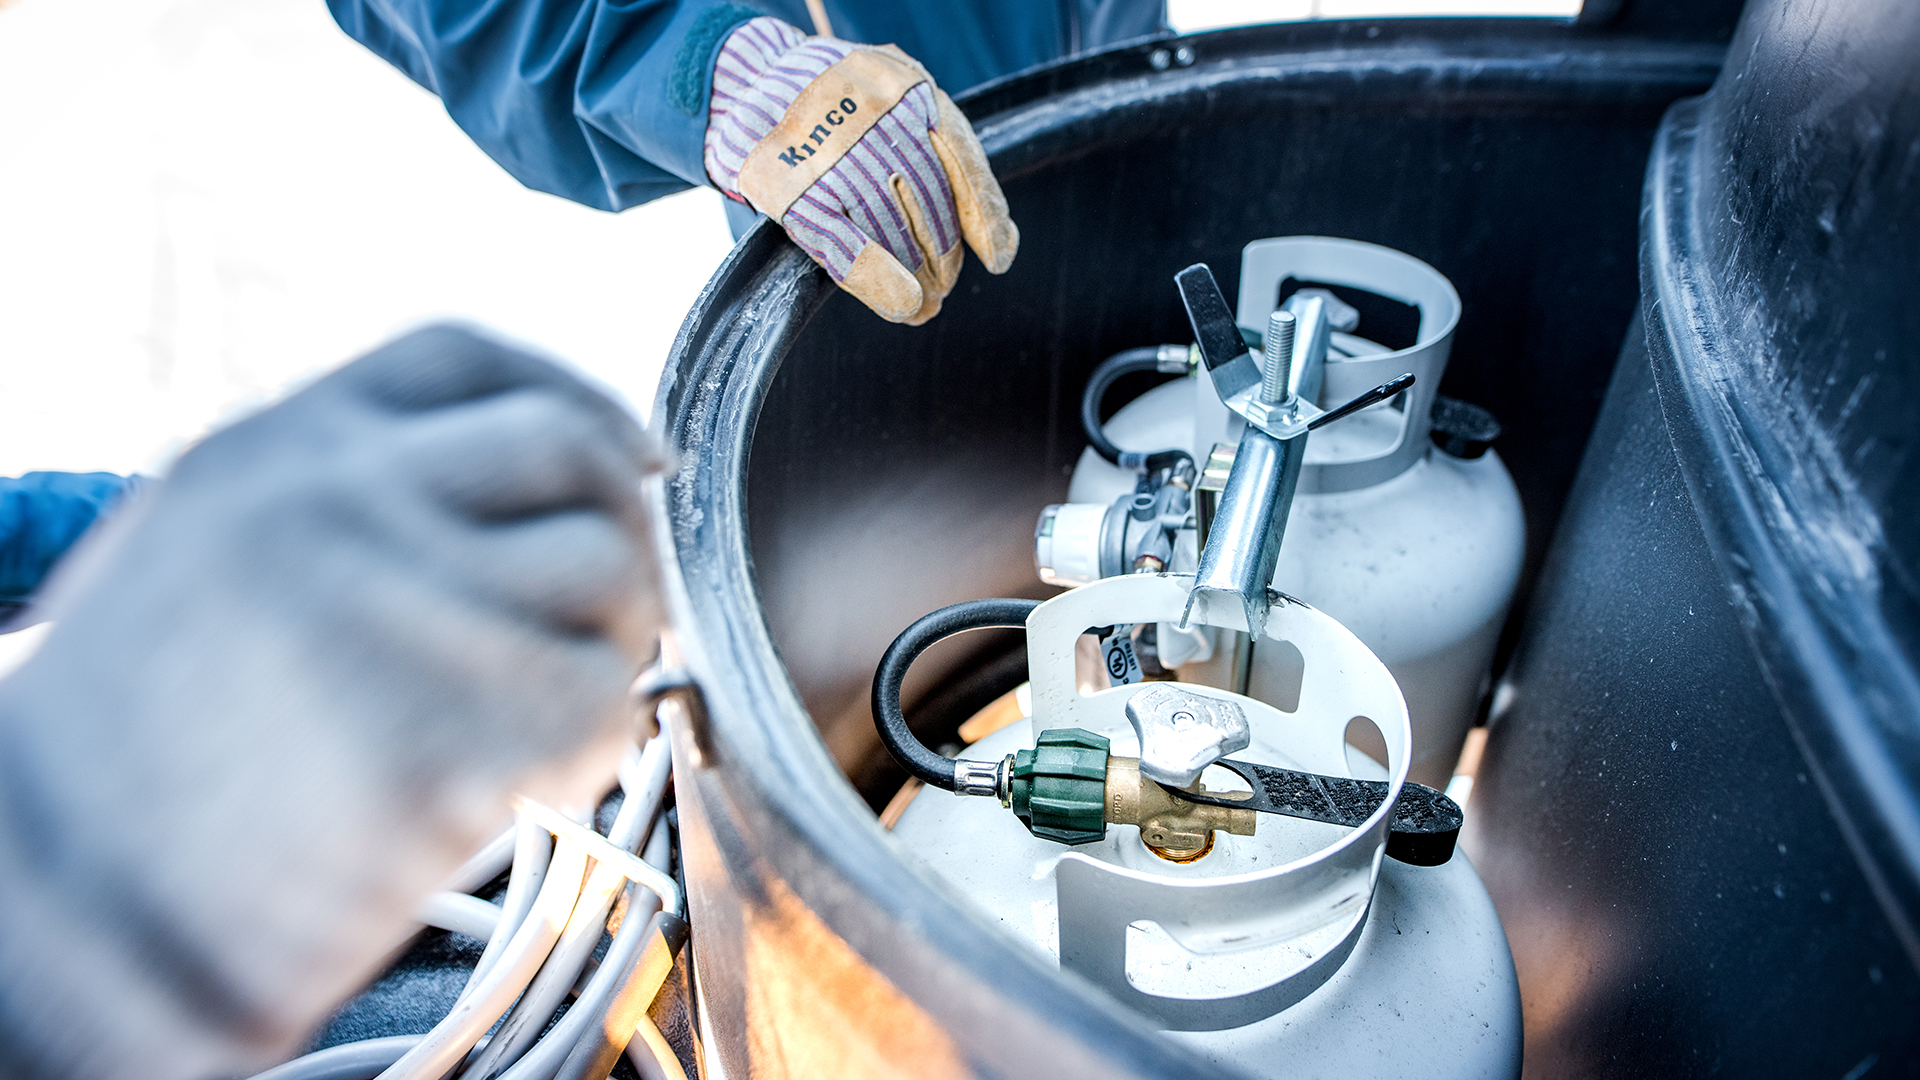
- Shut off the propane at the tank/s.
- Inflate, clean, and cover tires to protect from UV rays and air pollutants that can encourage dry rot.
- Apply dielectric grease to the 7-pin connector to prevent corrosion.
- If your water heater is gas and electric, make sure the electric heating element is turned off.
- Leave the fridge and freezer doors open to help dry them out. Pro tip: Crumple up newspaper and stuff it in the freezer and refrigerator compartment to absorb moisture, remove after 24 to 48 hours.
- Put open boxes of baking soda in the fridge to help eliminate odors during storage.
- Remove all food, paper, and cardboard from closets and doors to discourage rodents.
- Wash your Airstream before storing, especially the roof. Washing the roof will let you inspect for any water leaks, loose or cracked sealants, or any damage to AC covers or vents. If anything is amiss, get it corrected before putting your unit in storage.
- Lubricate all joints, pivot points, gears on your steps, and stabilizer jacks.
Step 4: Battery Storage
Batteries last longer if they are kept charged. Keeping your battery stored in your garage or workshop will encourage you to check on them. Removing the battery also gives you the opportunity to have it tested at a battery supplier and inspected for any damage. You can also check fluid levels in lead acid batteries and fill with distilled water if necessary to cover the tops of the plates. If you choose to leave your batteries in your Airstream during storage, you must keep them charged. This will require plugging the unit in or hooking up to a charge at least monthly. Batteries should be fully charged when placed in storage and maintained to keep batteries from freezing. Airstream does not recommend leaving your unit plugged in full time during storage. If the battery fails, the converter will try to charge it back up and you’ll end up boiling down the liquid in both batteries.Step 5: Final Winterization Steps
Once you’ve checked everything off the winterization list, it’s time to move your travel trailer into storage. We recommend storing your Airstream on gravel or concrete. Gravel and concrete help protect the tires from moisture which can degrade them over time. It also helps to keep tires fully inflated. Parking in areas where there are trees and tall grass can encourage unwanted guests (i.e. rodents). Never store your Airstream where overhanging tree branches can fall. If possible, it’s a good idea to store your Airstream where you can keep an eye on it, or somewhere with security to ensure its safety during the winter months.Now your Airstream is ready for winter! While it may be daunting, winterization is easier than you’d think. Once you learn how to do it, you’ll be set to protect your Airstream for many years to come. Winterizing information can also be found in the Maintenance section of your owners manual.